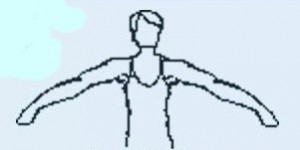
Though it may be where a dancer’s arms spend most of their time, second is the arm position that dancers struggle with most.
It’s more than just holding the arms out to the side, so here are some tips to help improve your second position.
If these help or if you have some of your own, be sure to add them to the comments.
Forget your arms for a moment
If you want to create a good second position; if you want to carry your arms to and from the proper shapes in dance; if you want it to look and feel easy and free, your alignment (or placement of the body) is the first step.
I won’t go too much into proper alignment here but do all of those things your teacher reminds you about:
- Stand tall and imagine space between each vertebrae in your spine (including the ones in your neck)
- Activate your abdominal muscles as if you have laces up the front which you gently tighten bringing the belly button closer to your spine
- Let your shoulders fall back and down with arms hanging easily at your sides
- Stack the body with your ear lobes over your shoulders, your shoulders over your hips, your hips over knees and ankles
Remember these things all the time as you dance or while you stand around. This all by itself will help to strengthen your core muscles for dancing and for creating the “pictures” we make in dance with our body.
This is where it all begins. Without good alignment and strong core muscles, it will be difficult to make a picture like second position.
What To Do
While standing with good placement as above:
- Lift the arms straight out to the side at shoulder height.
- Turn the palms forward, with the thumb flattened down between the first and second finger. Your fingers are all slightly spread apart.
- Move the whole arm (from the shoulder) slightly forward of the body, until you see the fingers in your peripheral vision (out of the corner of your eyes, without moving your head).
- Along the back of your upper arm is the tricep muscle. Slowly rotate the arm, lifting the tricep and the elbow to face the wall behind you. As you do this, the hands will lower slightly in space and the palms will turn toward the floor but you haven’t changed the shape they made before.
What To Think
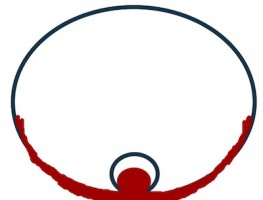
- Imagine a large circle that extends between the fingers and through the arms and body.
- Imagine that circle is a tube and you can breathe air into and around the tube
- Imagine you are hugging a giant redwood tree.
- Imagine your arms floating on top of the water like seaweed.
- Imagine your arms are resting on clouds.
- Imagine your hands are feathers.
- When you open to second position, imagine that you are pressing the walls outward and away from you.
Do you have more tips on what to do or think that would help with second position?
Were these helpful to you? If so, share them with someone else!
Nichelle Suzanne is a writer specializing in dance and online content. She is also a dance instructor with over 20 years experience teaching in dance studios, community programs, and colleges. She began Dance Advantage in 2008, equipped with a passion for movement education and an intuitive sense that a blog could bring dancers together. As a Houston-based dance writer, Nichelle covers dance performance for Dance Source Houston, Arts+Culture Texas, and other publications. She is a leader in social media within the dance community and has presented on blogging for dance organizations, including Dance/USA. Nichelle provides web consulting and writing services for dancers, dance schools and studios, and those beyond the dance world. Read Nichelle’s posts.
Hold a giant football in your arms with the tips of the ball in your palms. The largest part of the ball will be located in your chest area. Arms have to be slightly forward to make room for the “giant” ball. Not only is the ball giant but very long. Stretch from the back to the palms to accommodate it’s length.
Amazing! Whenever my teacher says that we are drooping our arms, she grabs her giant roll of gaffer tape and puts it on our wrists, and we can’t let thhe tape slide off. It also build arm strength. Thinking of these thing have really helped me! She doesn’t really give us things to think about, only to keep our arms up so that we don’t get the “gaffer wrist”!
Thanks so much,
Rebecca
It depends on the dancer, but imagery can sometimes help more than being told what to do or even how to do it. I’m glad you found these useful, Rebecca. Hope you are doing well!
This is just the sort of article I’m delighted to find, as I’m battling with what to do with my ‘dead hands’ my teachers have commented on, & I find it difficult to know how to hold the arms properly in 2nd.
Hands are practically their own post but ideally you want something that’s not too stiff and not too loose – both look a bit lifeless. You rarely want the wrist to break the line of the arm, rather it is an extension of the movement which begins at the back and shoulder. And practice watching the hands with your eyes as you dance, almost lovingly. The attention, in turn brings energy to the hand.
Thanks for sharing this image and tip, Michelle!
This is great advice Nichelle! For students in my class that would “forget about their arms” my teacher would get a large bows and tape it on each arm. It seems to work!
This is an issue I have been trying to figure out for the 30+ years I have been teaching. I have used all the imagery described, but have still not been satisfied with consistent results. The elbows still drop. It is difficult to learn (then remember!) to activate the triceps. Recently I have implemented a “new” technique. In every class I have my students do some of the exercises with their hands on their waists, elbows pushed forward. With my little ones, they may do this marching or skipping and the older students during petit allegro. At first I worried about rounded shoulders, but have discovered that this is something that easily corrects. When we are using port de bras and I am seeing lots of dropped elbows I remind the class to put their hands on their waists, then lift their hands devant or a la seconde without moving their elbows. Remarkable difference!
Thanks Leslie! For my younger classes I use the hands on the waist. Thanks for pointing out that this can be a purposeful choice and good preparation for the carriage of the arms. I’m going to restate for others reading that it is hands on the waist, not hips.
But I’m wondering, do you have them push the elbows forward of their torso, or do you mean forward as in not trailing behind (as tends to be the habit)? I ask because, in trying this with the elbows forward, when I lift the hands, my triceps are active but my back is not – that rounded shoulder you were talking about. I’m just thinking that rather than go back and then fix the rounded shoulder, why not begin with an emphasis on the elbows (and shoulders) in alignment?
To clarify, I do ask that they work to keep their shoulders down when they have their hands on their waists. That helps to activate the trapezius and deltoid muscles. And absolutely yes – waists – not hips. I also have them slide their hands a little more forward than usual so the fingers are coming toward each other. This also allows for the elbows to come more forward without as much rounding of the shoulders. And yes, I do mean elbows in front of the torso just like they will be in Second position. But really, I have not found that the shoulders become much of an issue when I talk more about keeping them “down” than “back”.
Great! Thanks for the clarification, Leslie! Keeping the hands more forward, I think, was the missing piece in making this method work for me. I had the hands further back and with the elbows pushed forward it was harder to keep that back and down feeling, & especially so for students who are already rounded and tight across the chest.
When asking students to show arms 2nd position – I always have them imagine themselves standing in a swimming pool and pushing the water away from ends of fingers keeping the back muscles engaged as they open from 1st to 2nd. Sometimes I even stand there in front of them and press my own hands against theirs for resistance as they begin to open to 2nd so immediately they are obliged to engage the back muscles which in turn helps them to support the arms in 2nd and immediately they feel how they are holding them in 2nd.
Thank you Rosemary! I love all the input on this post. There’s never one thing that works for all students, all the time so it’s great to have a pool of ideas to draw from when it seems like nothing is working. And it’s great for the students to read all these other thoughts too.
Great discussion. I would just underscore the role of back musculature in the port de bras, without which, no port de bras. Young ones tire easily with the arms held for long periods a la seconde, and so a break helps (“temps d’arret”). For example, four counts of leg work (whatever is going on–battements tendus, degages, whatever), and four counts of first port de bras to relieve the arms–this helps with drooping elbows. Also, the Cecchetti 1st port de bras at the start of centre floor is excellent for engaging the back musculature. The counts: arms to 5th en avant (1), opening (AND), arriving a la seconde (2), closing to 5th en bas (3 and 4). Big emphasis there on AND–that is where the back is engaged. Working with the fingertips placed on the shoulders, with the elbows lifed (held at 90 degrees to the body) readily engages the back musculature. In fact, you can ask children to place their arms in this position, and then to allow the elbows to drop, and then to lift them once more, and they will feel the muscles relax and engage. Very graphic. If little ones are allowed to wear a skirt to class, holding the hem of the skirt for some exercises will help them to establish the correct line of the arm in demi-seconde, if the skirt is long enough. This in turn will help them establish a clean position of the arms a la seconde, if they understand not to go higher than the shoulder. The shape of the hands and fingers during the transition from seconde to fifth en bas: I love to ask my kids to think of sitting on the edge of the bathtub as it is filling, moving the fingers gently back and forth in the water. Works like a charm and eliminates all kinds of affected, ugly “mitten” or “claw” hands. It is okay to allow the hands to be held in profile (palms turned down) as they are closing.
Nice post.